How to Spot Chimney Repair Needs

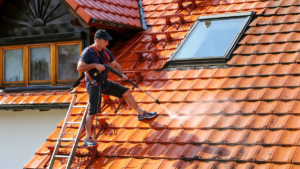
A chimney in poor repair is vulnerable to damage from harsh winter weather. Watch for cracks, crumbling bricks, and deteriorating mortar joints.

Even small issues should be addressed immediately. Failure to do so can lead to a leaning chimney, which compromises the structure and exposes your home to carbon monoxide poisoning. Contact Chimney Repair Baltimore now!

Heavy rains can cause your chimney to leak, especially if the flashing and chimney crown are in need of repair. Leaking chimneys can be very destructive and dangerous for the fires you light inside your home. If you notice a damp spot on your ceiling or walls, have a professional inspect the fireplace and chimney for water damage. A professional can use a variety of repair techniques to address the issue, depending on the severity of the damage and its location within the chimney structure.

Chimney gaps are a common cause of water leaks and must be repaired immediately to prevent further damage to the brick structure. Cracks and gaps in the mortar joints can let in rainwater, which may also freeze when it gets cold. This will make the cracks expand and can further weaken the mortar structure of your chimney.

Another sign of a chimney problem is a damper that is not working properly. The damper is a necessary part of your chimney that regulates the flow of air through the flue. If you notice a damper that is not opening or closing properly, contact your local chimney technician. They can inspect the condition of your damper and determine if it is in need of repair or replacement.

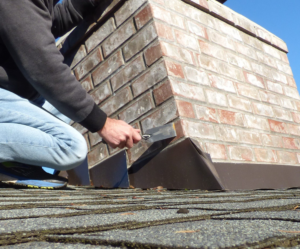
Chimney flashing is a metal seal that wraps the area where your chimney meets the roof of your house. It is designed to prevent rain water and snow melt from seeping into your fireplace. A damaged or missing chimney flashing can allow water into the chimney, resulting in costly water damage to the attic and walls of your home. If you suspect your chimney flashing is in need of repair, contact a chimney and roofing expert as soon as possible to avoid extensive water damage to your home.

The masonry materials of your chimney are naturally porous, making them susceptible to water penetration. Water damage to a chimney is exacerbated when it becomes freezing, as the water expands and erodes the bricks and mortar of the structure. Chimneys built of clay tiles, in particular, are prone to this type of damage. If you notice signs of water damage, including efflorescence, spalling brick, and deteriorating mortar joints, call for a chimney inspection. Your chimney expert may recommend a repair service like tuckpointing or rebuilding to restore the structural integrity of your chimney.

Cracked Mortar Joints

Mortar joints between bricks are a key component of the durability and longevity of brick walls, chimneys and other structures. These joints absorb the stress of wall movement, foundation settlement and exposure to the elements. They also provide a buffer between bricks, helping to prevent moisture from entering and causing damage. Cracked mortar joints should be repaired as soon as possible to avoid serious problems in the future, including water leaks, mold growth and other structural issues.

Masonry repair experts use a process called pointing (also known as repointing or tuckpointing) to restore and preserve mortar joints that have eroded due to age, weather, temperature changes and other factors. This process involves mixing a new batch of mortar and applying it to the mortar joints. In most cases, the color and texture of the new mortar should closely match the existing mortar in the joint.

When repairing cracked mortar joints, it is important to first clean the work area thoroughly and remove any loose or crumbling brick. Then, wearing safety goggles, a cold chisel and hammer can be used to cut at least 1/2 inch down into the old mortar, flushing the joint clean and creating a solid base for the new fill. Once the damaged mortar is removed, the work area should be cleaned again using a masonry brush to make sure there is a clean surface for the new mortar to bond.

Once the work area is prepped, a mortar mix that closely matches the existing can be mixed according to manufacturer instructions and loaded into a tuck-pointing trowel. The new mortar should be pushed into the joint and sculpted to match the existing brick, removing any excess as it hardens. To ensure the new mortar dries correctly, it may be necessary to wet down the brick and joints with a hose a few times per day for two or three days.

For smaller cosmetic repairs, a caulking gun and sanded acrylic mortar repair caulk can be used to apply a bead of caulking into the joint. The sanded caulk offers the texture and appearance of mortar, making it an option for homeowners who are hesitant to attempt a mortar mixing project.

Efflorescence

Efflorescence is the white, chalky substance that accumulates on brick chimneys, as well as other masonry structures. It’s a common sight and is often mistaken for dirt or weathering, but it’s actually a tell-tale sign of moisture problems within your chimney structure.

Essentially, efflorescence is the result of water seeping into a chimney’s masonry and dissolving the soluble salt particles naturally present in the brick, stone or concrete. As the water evaporates, it leaves a residue of salt on the exterior of your chimney that shows up as a white or sometimes brownish crystalline deposit.

It’s possible to prevent the formation of efflorescence by using building materials that don’t contain high amounts of soluble salts during construction, ensuring that your chimney is properly sealed, and providing adequate drainage away from your chimney. Additionally, you can reduce the likelihood of efflorescence developing by providing a proper chimney liner and making sure there is no cracking or leakage in your roof’s flashing.

If you notice the unmistakable white stains of efflorescence on your chimney, you should contact a professional chimney mason for an inspection right away. They’ll thoroughly examine the area, looking for cracked brick, mortar joints, missing mortar, damaged flashing and other signs of excessive water penetration. They’ll also recommend a chimney waterproofing sealant to keep the stains from returning in the future and protect your chimney against more extensive damage.

Although some efflorescence is normal and harmless, it can indicate a serious problem that needs to be addressed immediately. It may be caused by rainwater soaking into the masonry, or it could be that your flue liner is cracked and leaking hot gases from the fireplace down into cold brick, where they condense and cause the masonry to deteriorate quickly.

While you can clean some forms of efflorescence by washing the crystalline deposits with water or by applying an acidic solution, it’s best to leave this type of chimney repair to a certified mason. Attempting to power wash or sandblast off these deposits can be dangerous for you and your chimney, and it won’t stop the white stains from returning.

Degradation

Chimneys look strong, and so it’s easy to forget that they need maintenance just as the rest of our homes do. Rain can damage the masonry, or mortar joints, causing it to deteriorate. Depending on the extent of the damage, this can be very dangerous as it reduces the strength and fire proofness of your chimney structure. One way to spot degradation is by looking for bits of masonry on the ground near your fireplace. Another is to notice the presence of moss on or inside your chimney. These signs indicate that your chimney is deteriorating.

Chimney deterioration is most commonly caused by water damage, but it can also be due to other factors. For example, if your chimney liner is not properly installed, it may not prevent condensation that leads to acidic creosote buildup. This can cause drafting issues, and can lead to chimney explosions.

Having your chimney regularly inspected by a professional is the best way to catch any problems that need to be repaired, including degradation. Degradation is a natural process, but it can accelerate dramatically if your chimney is not protected from water damage.

Mortar joints are a common place for moisture to enter your chimney, but the bricks themselves can also deteriorate. This is known as spalling, and it’s an extremely serious problem that requires immediate attention. It causes the bricks to fall apart, which exposes your chimney to further damage and a significant safety hazard.

Another issue that can result from water entering your chimney is rusting. If your chimney has a metal flue liner, it will likely be constructed from aluminum or steel. These metals are not prone to corrosion, but your flue liner can still rust and lose its ability to convey combustible gasses safely out of your home.

If you’re concerned about the state of your chimney, it’s important to understand the clear warning signs that indicate a need for repair. It’s important to inspect your chimney from all angles, using binoculars to get a closer look at hard-to-see areas. If you see any cracks or deterioration, call a chimney specialist right away to schedule a repair appointment.

The Importance of Dock Building

Docks are crucial nodes in the global supply chain, enabling efficient cargo handling and vessel turnaround. They are also focal points of maritime heritage and industry. Contact Dock Building Charleston SC now

Building a dock requires careful planning and design. It should be constructed with materials that are resistant to rot, wear and corrosion. Regular maintenance is essential to ensure that your dock lasts for years to come!

The location of a dock building site is crucial for the effectiveness of the facility. A dock must be positioned in a way that minimizes the distance between it and the warehouse building, while also minimizing the number of times materials need to be transported from one area to another. This is particularly important when a warehouse follows a just-in-time policy and requires frequent deliveries. In addition, the access point to a dock must be designed to handle varying heights of lorries. Refrigerated vehicles have cradle heights of up to 1 metre, while removal lorries and low chassis semi-trailers can have cradle heights up to 0.9 metres.

Docks must be located in waterways that are deep enough to accommodate them. The composition of the seabed is also an important consideration. For example, sand and silt are not suitable for floating docks, while clay and rocky beds can support them. The local climate should also be taken into account, as it can influence the choice between fixed and floating docks. High winds and waves are better suited to floating docks, which can absorb the effects of storms and waves. In contrast, fixed docks may be damaged by these factors.

The next step in the process of dock building is to prepare the site. This involves clearing the area of rocks, debris and other obstacles. The site should also be levelled and marked for the position of the dock pilings, which are the vertical supports that hold the decking of the dock. Taking the time to do this preparation work will save money and stress during construction.

Before beginning construction, it is a good idea to check with the local government for permits, if necessary. Many towns and cities have requirements for dock building, including zoning laws. It is also a good idea to file plans for the dock with the city or township, as well as to obtain any other required permits.

Lastly, the dock must be built with quality materials. This includes a decking surface, pilings and a concrete base. The decking material is typically pressure treated southern yellow pine, which is a strong and durable material that will last for 30 years or more. The pilings are then installed with a pile driver, which is an efficient tool for driving concrete into the ground.

Materials

The materials used in dock building can have a significant impact on how long the structure lasts and what maintenance is required. There are many different options available, and the best choice for you will depend on your specific needs and preferences. The right materials can make your dock more functional, durable and beautiful, adding to the overall value of your property.

The type of wood used for the frame and substructure is a critical factor when choosing a dock construction material. YellaWood’s products are made from southern yellow pine, which is a premium lumber that has been pressure-treated with preservatives to ensure longevity in lake environments. This treatment helps to prevent rot, fungal decay and termite attacks, as well as protect against the effects of UV radiation on the wood.

Alternatively, you could opt for a composite decking material like TimberTech. This material blends durability with style, making it a popular choice for lakeside docks. It has a natural appearance that complements the surrounding waterfront, while being resistant to fading, weathering and mildew. It’s also an eco-friendly choice and can be customized with a variety of colors and designs to suit your waterfront lifestyle.

Another alternative to traditional wood is exotic hardwoods, which are often used in high-end docks and marinas. These include Ipe, Cumaru and Tigerwood. These types of wood have a very high cost, but they’re naturally resistant to rot, mold and mildew and will not splinter.

In addition to these options, there are a number of other materials that can be used in the construction of floating docks. PolyDock systems, for example, are a modern innovation that use a unique technology to provide superior resistance to the elements. The polyethylene they are made from is rotationally molded, which creates uniform thickness for increased strength and enhanced durability. It is also infused with UV-8 inhibitors to protect against the harmful effects of harsh sunlight on the dock’s surface.

Steel is another common choice for dock pilings, due to its ability to withstand the conditions in which it will be immersed. Stainless steel can be welded to form a sturdy platform, and it can be fastened using blind bolts to help prevent corrosion and damage.

Design

The design of a dock is crucial to its success. Whether you are planning to use your dock for boating, fishing, swimming, or other recreational activities, it is important that it be safe and easy to access. This is especially true if your dock will be used by children. To ensure safety, make sure that your dock has a secure ladder, railings, and plenty of space for people to move around. It is also a good idea to put in a ramp for loading and unloading boats.

Another important factor to consider is the type of materials you will use in your dock. You should choose materials that can withstand the elements and last for a long time. For example, metal beams can be more durable than wood. They are also more resistant to rust and corrosion. Additionally, you should choose a material that will be easily cleaned and won’t absorb water. This will help to prevent any problems with the structure of your dock in the future.

Once you have chosen your location and materials, it’s time to start building your dock. First, you’ll need to install the frame. Once this is complete, you can install the decking. Once this is done, you can begin enjoying your new dock!

One of the most popular designs for docks is a floating dock. These docks are made of steel tubes, barrels, and air chambers that allow them to float on the water. They are very versatile and can be designed to accommodate a variety of needs. They can be built to accommodate boats, fishing platforms, and even gazeboes.

If you’re looking for a more permanent solution, you may want to consider a fixed dock. These are anchored to the bottom of the lake or river, and they can be made from wood or concrete. They’re a great option for those who enjoy spending their weekends on the water.

In addition to the standard features of a dock, you can also add extras such as a hot tub or an outdoor hammock. This will make your dock a relaxing and comfortable place to spend your time. You can also install a wooden awning to provide shade and protection from the sun.

Safety

Dock building is an important part of facility operations, but it can also be dangerous for employees and truck drivers. In fact, twenty-five percent of industrial accidents occur in the loading dock area. That’s why it’s important to take steps to ensure dock safety.

In the dock area, it’s essential to have proper lighting and to keep the walkways clear of debris and trash. This will help prevent accidents caused by employees and trucks moving through the area. It’s also a good idea to provide hard-hats and other safety gear to all workers, as well as to set up training programs on safety protocols and procedures.

Loading docks are busy areas, and that means there is a lot of traffic in and out. Adding safety measures to the loading dock will prevent accidents that can harm workers and damage equipment. This can include implementing a system of wheel chocks to ensure that trucks and trailers don’t move while being loaded or unloaded.

Another crucial part of dock safety is the use of vertical storing levelers. These allow trucks to back in and out of the dock without requiring someone to stand outside to open the trailer doors. This reduces the amount of people in the path of truck and forklift traffic, reducing the risk of injuries.

It’s also important to choose the right materials for your dock. You want materials that will withstand heavy weathering and water conditions. In addition to choosing pressure-treated lumber and other decking materials, you should also opt for hardware made from galvanized or marine-grade stainless steel. This will protect the metal from corrosion and help it withstand the elements.

In addition to these steps, it’s a good idea to install dock seals and shelters to protect your facilities from extreme weather conditions. This will keep your materials and equipment safe from damage and prevent accidents due to inclement weather. It’s also a good idea for facilities to regularly inspect their docks, including checking the load capacity of dock plates. Additionally, the loading dock should be kept clean to prevent slips and falls.

What Is Roof Cleaning and Why Is It Necessary?

Roof Cleaning Charleston SC is the process of removing algae, mildew, moss and lichen spots from a home’s roof. It also reveals areas that are damaged or in need of repair.

Chemical solutions are usually used to treat and kill stains on a roof. They can be applied either by hand or with a sprayer.

Storms, high winds, and even the growth of moss on a roof can result in debris build-up. This material can damage shingles or tiles, making them more vulnerable to breakage in high wind and also leaving them susceptible to moisture penetration and damage to the substrate or attic of your home. Small pieces of debris can also clog gutters and cause wet spots on interior walls. The best way to protect your roof is to make sure you are routinely removing debris. This can be done by sweeping or using a leaf blower, particularly after a wind storm. It is also a good idea to trim any trees that hang over your roof to ensure they are not creating excess shade and dropping leaves or other materials on the surface of your roof.

When you do decide to remove debris, it is important that you do so in a manner that does not damage the roof or the ladder. Always use a ladder that is in good condition, and avoid walking on the roof itself unless you are completely comfortable doing so. Debris can be quite heavy, and fighting with it while trying to maintain traction on the ladder is dangerous, especially if the weather is bad.

Once you are ready to begin cleaning, you will want to start with the lightest materials first. A broom or leaf blower can quickly remove light debris such as pine needles or dry leaves. For the heavier items, a ladder with a tarp can be placed under the item, and then it can be blown or lifted away. This method allows you to save time and energy while avoiding the potential for damage.

Depending on the type of roofing material, there may be additional steps that need to be taken to clean it. A specialized cleaning agent is used to gently clean asphalt shingles, for instance, while cleaning cedar shakes may require a mixture of water and detergent or bleach.

When the cleaner is applied and has had a chance to work, it should be rinsed off with a garden hose. The rinsing is meant to rinse the cleaning solution as well as any loosened grime or dirt. Once the roof is fully rinsed, check to make sure the gutters and downspouts are free of clogs, and then recheck your roofing materials for any signs of damage or wear.

Algae Removal

Algae is the dark discoloration and streaks you may notice on many roofs, especially those near coastlines or in humid climates. Algae thrive on the perpetual moisture that dwells on roof surfaces, and can quickly spread and eat through roofing materials if not removed. Left unattended algae will shorten the lifespan of your shingles and can lead to roof leaks, rot and mold problems.

The Asphalt Roofing Manufacturers Association (ARMA) recommends using a bleach-and-water solution to kill and remove algae. This consists of a 50 percent mixture of laundry strength liquid chlorine bleach and water that is applied to the surface of the roof with a sprayer or garden hose. The mixture should be allowed to dwell on the surface for 15 to 20 minutes, and then rinsed thoroughly with low pressure water. When working with chlorine bleach, always take proper safety precautions to protect yourself and others. Also, be sure to wet foundation plantings that receive run-off from the roof with clean water before you start spraying the bleach solution on them.

While bleach is effective in killing and removing the algae, it does not rinse away completely. ARMA advises rinsing with clean water after the bleach wash to fully remove the remaining debris and prevent the growth of new algae. You can speed up the rinsing process by blowing water downward on the roof, but be careful not to get the water under the shingles.

A more permanent solution for curbing algae is to install strips of copper or zinc on the roof, just below the chimney area. These metals are toxic to algae, and when it rains the copper or zinc washes down the roof, killing any existing algae and keeping it from regrowing.

Moss is harder to get rid of, but a thorough cleaning with a special moss removal product is helpful. You can try spraying the roof with a fungicide, or you can use a small, semi-stiff brush to loosen and then rake the moss away. The best time of year to do this is when the roof has rained recently but not yet dried.

Chemical Treatment

When it comes to removing moss, lichen, mildew and other organisms that can damage a roof over time, chemical treatment is the best option. This method uses specific chemicals such as a low concentration of chlorine bleach, sodium percarbonate or copper sulfate to kill and remove the organisms from the roof surface. Usually, these chemicals are left to work for a period of time before the roof is rinsed with low pressure water. This method requires special training and the use of a professional roof cleaning crew to ensure that the chemicals are applied correctly, are safe for your plants, trees and animals, and are rinsed properly.

If you are selling your home, a professionally cleaned and treated roof can significantly increase its resale value as prospective buyers will be impressed with how fresh and clean the property looks from the ground and through the window. However, it is important to note that a roof that has been chemically treated should never be rinsed with high pressure water as this may result in dislodging the granules of asphalt shingles.

Most roof cleaners use a low dilution of commercially available, household strength sodium hypochlorite (pool chlorine). Some also use other chemicals such as TSP, enhancers and alcohol. While these solutions are effective at killing and removing most organisms, they can be very corrosive to metal roof fasteners, gutters and rubber fittings – especially if the chemicals are not rinsed properly. Additionally, these chemicals can void a roof warranty and may even damage landscaping and other vegetation in the surrounding area due to runoff.

Many roof cleaning companies also offer a soft washing service that utilizes a more gentle and lower concentration of cleaning chemicals. This can be an excellent option for delicate surfaces that are not suitable for high-pressure washing such as wooden panels and screens. These methods can also be used to clean surfaces that require a more immediate results such as those with organic stains, mildew and algae growth.

One such product is Benz Lightning Cleanze which is a non-corrosive, biocidal solution that works well for most types of roofing materials including shingle and tile. It is also ideal for non-porous natural and man-made slate.

Rinsing

Although modern asphalt shingles are designed to be less prone to moss and algae growth as well as those unflattering black streaks, environmental factors and lack of regular cleaning can take their toll. Not only are these stains cosmetically unsightly, but they can also cause roof damage that may result in water leaks and costly home repairs.

One of the most effective methods to keep your roof clean and free from these unwanted organisms is through soft washing. This process involves a low-pressure application of biodegradable chemicals that can be mixed with water to thoroughly remove any spores and dirt that have accumulated on your roof. During a soft wash, the cleaners can penetrate all nooks and crannies of your roof, killing algae, mildew, mold, moss and lichen at the cellular level.

The chemical ratios used for a proper wash will vary depending on the current state of your roof. Since most homeowners will only have access to a much less concentrated bleach solution (typically hardware stores will only sell you solutions at 6.5% compared to the 12.5% Sodium Hypochlorite/Pool Shock that is used by professionals), it is recommended to hire a professional to assess your roof and determine which ratio of bleach to water will be necessary.

When bleach is mixed with water it forms a Hydrogen Chloride ION that battles with the organic matter on your roof (i.e. the spores and algae). After this battle, the Hypochlorite ION will have degraded and all that remains is bleach. It is important to rinse well to remove all the bleach from your roof and prevent a potential reaction with the plants, trees and grass around your house.

During your rinse, it is important to check and make sure that all gutter downspouts are fully open to prevent any rinsing into the landscaping surrounding your home. It is also important to inspect your garden and any other outdoor landscaping for the presence of bleach runoff, which can be deadly to plants. Once the rinsing is complete, your roof will be safe to use and should last 3-5 years, unless the environment surrounding your home requires frequent washing, such as if you are located under a lot of canopy, or has problems with storm residue build up on the roof (valleys etc). If this is the case then the roof will require more frequent cleaning.

Septic Tanks and Pumps

If you’re considering buying a home with a septic system, it’s best to make your offer contingent upon passing a septic inspection. This will help protect your investment and avoid costly repairs down the road.

The septic tank is a buried, water-tight container that collects wastewater from all household plumbing connections. Solid waste sinks to the bottom forming sludge, while oil and grease floats to the top creating scum. Contact Septic Tank Armadale now!

Septic tanks are large underground containers that house domestic wastewater for basic sewage treatment and disposal. They provide a more environmentally friendly, cost-effective, and sustainable alternative to public sewer systems that use energy-intensive processes.

A typical septic tank is made of concrete, fiberglass, or plastic and has two chambers through which water waste flows for separation. Heavy solid waste sinks to the bottom of the tank while light solids and liquid waste float on top. Bacteria in the tank breaks down these wastes, allowing the liquid effluent to flow out of the tank and into the drain field.

The septic tank system also filters waste before it enters the environment. The bacteria in the septic tank break down the contaminants and the wastewater is then returned to the soil, cleaned and absorbed by plant life.

Wastewater from toilets, showers, bathtubs, and sinks is poured into the inlet pipe of the septic tank. From there, the wastewater travels through a series of pipes called a septic tank system.

These pipes are installed on the property, buried in the ground near the home. A septic tank system is typically composed of one or more septic tanks that are connected to each other via a series of baffles. Each septic tank is fitted with an inlet and an outlet pipe that lead to and from the drain field.

Each septic tank is sized to accommodate the daily wastewater generated by the house. The septic tank system is designed to hold between 1,000 and 1,500 gallons of waste.

A septic tank can be clogged with debris such as hair, food scraps, grease, and foreign objects that are flushed down the drain. A septic tank that is over-full or clogged can cause sewage to back up into the home. Backed-up septic systems are a health hazard and should be addressed immediately by a plumber.

A well-maintained septic tank is durable and can last for many years with periodic maintenance and cleaning. Regular professional inspections can prevent major failures, which can be costly to repair. In addition, having the septic tank regularly pumped can help keep bad odors at bay.

Septic Pumps

A septic system relies on a pump to move wastewater to and from the tank. There are several different types of septic pumps, each designed to handle different jobs. The type of pump you need depends on how much wastewater flows through your home and how often it needs to be pumped. Sewage pumps are the best choice for moving raw sewage waste, while effluent pumps are ideal for relocating filtered water.

The main function of a septic tank is to treat and store household sewage that cannot be drained into the sewer system. Untreated sewage would quickly clog the absorption field, but a septic tank prevents this by separating solids from wastewater. Heavy solids settle at the bottom of the tank and form a layer known as sludge, while lighter solids—including oils and greases—rise to the top and form a layer called scum. Bacteria in the tank breaks down these solids, allowing liquids to separate from them and drain easily.

To prevent solids from clogging the outlet pipe and drain field, a septic tank is designed with baffle walls. The number of baffle walls in a septic tank depends on how many compartments it has. Single-chamber tanks have no baffle walls, while two- and three-compartment tanks have one or more. A septic tank’s baffle walls keep sludge and scum from flowing into the outlet pipe and drain field, which can prevent the system from working correctly.

Regularly pumping your septic tank and inspecting your septic system are vital to keeping it functioning properly. A professional can help you determine how often you need to have your septic tank pumped, measure the layers in your tank and keep records of pumping, inspections and maintenance. You can reduce the frequency of septic tank pumping by only flushing septic-safe items and being careful about what you throw down your drains and toilets.

If you have a septic system, you should map out the location of your tank and other system components. This will help you avoid damaging the tank or other parts of your septic system while doing yard work. You should also keep trees, shrubs and other long-rooted plants away from the drain field to prevent roots from growing into pipes or clogging them. In addition, adding 8 to 12-inches of mulch around the septic tank and drain field can help prevent soil compaction.

Septic Installation

A septic tank treats wastewater that flows from a house’s plumbing system. It removes waste and debris, leaving only clean water to enter the groundwater supply. A septic tank is usually constructed of concrete or plastic and comes in a range of sizes for different home use. It links to a drain field, also known as a leach field, through a pipe that runs underground. A septic tank and drain field work together to purify waste water that flows into groundwater supplies.

The sewer drainpipe carries waste into the septic tank, where it begins to separate. Solids settle to the bottom of the tank, while oils and fatty substances float on top. Bacteria inside the tank break down the solids to make the liquids more manageable. An inlet and outlet baffle help regulate the flow of solids into and out of the septic tank. Inspectors check these baffles to ensure that they are attached to the inlet and outlet pipes firmly.

After the solids have been processed, wastewater flows into a drain field, which is made of perforated pipes laid in porous gravel. The effluent from the septic tank goes through the pipes, into the gravel, and into the soil beneath the surface. It slowly seeps into the subsoil, where it is purified and naturally returned to the groundwater supply. The drain field is usually located in a large open area of the yard, and homeowners should keep it free from structures such as pools or driveways to prevent damage.

To get the most out of your septic system, have it inspected on a regular basis. An inspection will make sure it is working correctly and that your yard stays healthy. Regular septic system maintenance helps to prolong the lifespan of your septic tank and reduce the risk of costly repairs.

A well-maintained septic system can add to your home’s value, making it easier to sell your property in the future. It can also reduce your utility bills and keep foul odors, slow draining sinks, and clogged toilets at bay. Contact a reputable septic system company to schedule an inspection.

Septic Repair

Many homeowners choose septic systems instead of traditional city sewer because they can be more affordable and less disruptive to the landscape. These systems are designed to meet the needs of your home, but they need regular maintenance to keep them functioning properly.

If your septic system is not properly maintained, you may experience problems that require septic tank repair. One of the most common issues is sewage backup in your home. This problem occurs when the septic tank is full or there is a major blockage in the line from the house to the septic tank. Other causes include a failure of devices in the septic tank, a failing drain field or soil erosion around the system.

You can reduce the likelihood of sewage backup by having your septic tank emptied regularly. Most septic tanks need to be pumped out every three to five years. You can tell that the tank is getting full when your drains are backed up or slow to work and water puddles form on the ground above the septic tank.

A septic tank is made of concrete, fiberglass or polyethylene. These materials are ideal because they are not prone to cracking when buried underground. If the tank cracks, waste will leak out of the tank and into your yard. The crack may be small and hard to detect, but you can spot it by the odors that waft out of your home or by the fact that the septic system is overflowing.

Once the liquid waste leaves the septic tank, it goes to the drain field through pipes. The drain field is surrounded by soil that naturally treats the wastewater, reducing its toxicity and odors. The soil in the drain field also prevents harmful bacteria from entering the water supply.

You can help your septic system function more efficiently by maintaining grass and keeping deep-rooted plants and shrubs away from the absorption field. You should also minimize water use to reduce the amount of wastewater that enters your septic system. There are several products on the market that claim to restore your septic system’s bacterial balance, but these additives are not necessary since bacteria already live in human feces. A septic tank repair expert can recommend other ways to keep your septic system healthy and working well.